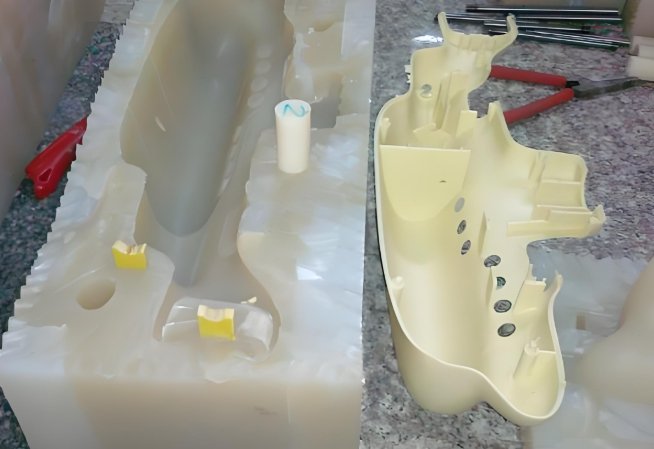
Rapid Prototyping is changing product development. It speeds up the design process. It reduces costs. It allows companies to test ideas faster. Injection mould companies use this method to bring products to life quickly.
In this guide, we’ll explain Rapid Prototyping step by step. You’ll learn how the process works and its benefits.
What is Rapid Prototyping?
Rapid Prototyping creates physical models from digital designs. It uses advanced technologies like 3D printing and CNC machining. Companies use these prototypes to test and improve their products.
Step 1: Design the Concept
Everything begins with an idea. Designers create a 3D model using software. Common tools include CAD (Computer-Aided Design) programs.
Why CAD Matters
CAD software makes the process accurate. Designers can adjust details easily. This digital design serves as the foundation for Rapid Prototyping.
Step 2: Choose the Right Technology
Different technologies create prototypes. The right choice depends on the project. Popular methods include:
1. 3D Printing
3D printing builds parts layer by layer. It works well for small, detailed prototypes.
2. CNC Machining
CNC machines carve material into shape. This method is highly precise. It works for stronger prototypes.
3. Stereolithography (SLA)
SLA uses lasers to harden liquid resin. It creates smooth, accurate parts.
4. Vacuum Casting
This process uses silicone molds to produce prototypes. It’s ideal for low-volume production.
An Injection mould company can recommend the best technique.
Step 3: Select the Material
The right material is crucial. Materials depend on the prototype’s purpose. Common options include:
1. Plastics
Plastics are lightweight and affordable. They work well for early testing.
2. Metals
Metals offer strength and durability. Aluminum and steel are common choices.
3. Resins
Resins create smooth, detailed prototypes. They are used in SLA processes.
4. Composites
Composites combine strength with flexibility. They are popular in automotive and aerospace industries.
Step 4: Build the Prototype
Once the design and material are ready, the prototype is built. The machine reads the CAD file. Layer by layer, the part takes shape.
Key Steps:
- Upload the CAD file to the machine.
- Adjust machine settings.
- Begin the build process.
- Monitor the machine for accuracy.
This step may take hours or days, depending on size and detail.
Step 5: Post-Processing
After the prototype is built, post-processing begins. This step improves the prototype’s look and function.
Common Post-Processing Techniques:
- Sanding: Smooths rough edges.
- Polishing: Adds a shiny finish.
- Painting: Enhances appearance.
- Assembly: Combines parts if needed.
An Injection mould company ensures prototypes meet specifications.
Step 6: Test the Prototype
Testing is critical. Prototypes are analyzed for accuracy, durability, and function. Engineers identify flaws and fix them.
Types of Testing:
- Fit Testing: Checks if parts fit together.
- Function Testing: Ensures the prototype works as intended.
- Stress Testing: Evaluates strength under pressure.
Step 7: Refine the Design
Based on testing, improvements are made. Designers update the CAD model. Another prototype may be built. This cycle continues until the product is perfect.
Why Iteration Matters
Prototyping allows multiple refinements. This reduces errors before final production.
Role of Injection Mould Companies in Rapid Prototyping
An Injection mould company plays a key role. They provide high-quality molds for prototypes. Their expertise ensures accurate results.
How They Help:
- Offer guidance on materials.
- Produce strong and durable molds.
- Support low-volume production runs.
Benefits of Rapid Prototyping
1. Faster Development
Prototypes are built quickly. This speeds up the design process.
2. Cost Savings
Errors are fixed early. Companies avoid costly mistakes.
3. Design Flexibility
Designs can be updated easily. This allows room for creativity.
4. Better Collaboration
Physical models help teams share ideas. This improves communication.
5. Early Testing
Prototypes are tested for flaws. Products are refined before mass production.
Challenges in Rapid Prototyping
1. Material Limits
Some materials are not suitable for prototyping.
2. High Costs for Advanced Methods
Technologies like SLA can be expensive.
3. Limited Strength
Prototypes may not match final production strength.
An Injection mould company can address these challenges.
Future of Rapid Prototyping
1. Faster Machines
New machines will build prototypes in hours.
2. Advanced Materials
Innovative materials will improve strength and flexibility.
3. AI Integration
AI will optimize designs for better efficiency.
4. Multi-Material Printing
Prototypes will combine different materials in one process.
Rapid Prototyping transforms product development. It speeds up design, reduces costs, and improves accuracy. Step by step, the process turns ideas into reality.
An Injection mould company plays a vital role in this process. They provide expertise and precision. Rapid Prototyping will continue driving innovation. For better designs and faster production, embrace this technology today.
