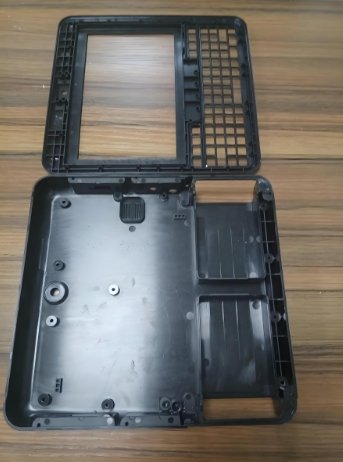
Bringing a plastic product to life is a journey. It starts with an idea and ends with a finished part on a store shelf—or inside a device. For plastic housings used in electronics, tools, and appliances, housing injection molding is the go-to solution. But how do you go from a simple sketch to a full production run?
It all begins with a mold maker—someone who can turn your prototype into a reliable mold for mass production. In this guide, we’ll walk you through the full process of plastic housing development. You’ll learn what steps to take, what to avoid, and how to ensure success from prototype to production.
1. Defining the Concept
Everything starts with the concept. You might have a sketch or a CAD file. At this stage, the key is to focus on function, dimensions, and how the housing will fit with other parts. A clear concept helps your mold maker understand your goals.
Things to consider:
- What will the housing protect or enclose?
- Are there ports, vents, or buttons needed?
- Should it be strong, lightweight, heat-resistant, or waterproof?
The more details you give, the smoother the process of housing injection molding becomes.
2. Creating the 3D Design
Once your idea is defined, a 3D model is created. CAD software is used to develop the housing geometry, wall thickness, ribs, screw bosses, and snaps. This is the base for everything else.
At this point, a skilled mold maker can review your design and give suggestions. These reviews focus on:
- Draft angles for easy ejection
- Uniform wall thickness to avoid warping
- Radius and corner smoothness to improve mold flow
A great design makes a better mold. A weak design wastes money and time.
3. Making a Prototype
Before moving to tooling, it’s smart to create a prototype. This helps confirm the look and feel of the plastic housing. It also allows for function testing before large expenses.
Common prototype methods:
- 3D printing (fast and cheap)
- CNC machining (accurate and tough)
- Urethane casting (for multiple samples)
Prototyping helps catch mistakes early. You can show the part to users, partners, or investors. And you avoid costly errors when starting housing injection molding.
4. Design for Manufacturing (DFM)
DFM is a crucial step. Here, your mold maker takes your design and adjusts it for actual injection molding. The goal is to make the part easy and cheap to mold.
DFM looks at:
- Gate location (where the plastic enters)
- Parting lines (where the mold opens)
- Ejector pin marks
- Venting and cooling needs
A smart mold maker will work with you to refine the part—without changing how it functions. That’s the real value of experience.
5. Mold Making
This is where the real tooling begins. Your finalized design is sent to the tool shop. The mold maker chooses steel or aluminum, machines the core and cavity, and assembles the mold.
Steps involved:
- CNC machining
- EDM (electrical discharge machining)
- Polishing or texturing
- Installing slides, lifters, ejectors
This stage may take 3 to 8 weeks depending on mold complexity. Good communication with your mold maker is key here to avoid delays.
6. T1 Sample and Testing
Once the mold is done, it goes to a trial run. This is the T1 sample—the first shot using your housing injection molding tool. These samples are carefully measured and checked.
What to look for:
- Are the dimensions correct?
- Are there sink marks, flashes, or warps?
- Do snap-fits and screws work as expected?
Most T1 samples need minor adjustments. Your mold maker will tweak the tool until it’s perfect.
7. Final Approval and Mass Production
Once T1 samples pass all tests, you’re ready for production. The mold maker hands off the tool to the injection molding team. From here, plastic housings are molded in batches—hundreds, thousands, or even millions.
You can now:
- Place your production order
- Decide on packing and labeling
- Arrange delivery schedules
With proper cooling and maintenance, your housing injection molding tool can last for years.
8. Post-Molding Services
Beyond molding, a good mold maker may offer support such as:
- Mold storage and maintenance
- Tool modifications for product updates
- Spare parts and repairs
These services reduce future costs and downtime. They also help if you plan to make new versions of your housing in the future.
9. Common Mistakes to Avoid
To keep your journey smooth, watch out for these pitfalls:
- Skipping prototyping: It’s cheaper to fix issues early.
- Poor DFM planning: This causes tool changes and delays.
- Rushing the mold build: Speed should not replace quality.
- Ignoring part testing: Always test real samples before launch.
Work closely with a professional mold maker and trust their process. It pays off.
10. Final Thoughts
Turning an idea into a working plastic housing is no small job. It takes time, planning, and expert help. With the right mold maker, your product can move from prototype to production with fewer surprises and better results.
Remember:
- Design smart from the beginning
- Use DFM to prevent molding issues
- Choose the right prototype method
- Test before committing to mass runs
- Stay in touch with your mold maker throughout
Housing injection molding may seem complex, but it becomes easier with the right team. And the reward is worth it—a durable, precise plastic housing ready for market.
